Showing posts with label Papercraft. Show all posts

Friday, February 27, 2015

Invites With Ellen Hutson Zipper Panel Die

You all know that I love clever things. I've been on the look out for some interesting dies for my Sizzix die cutting machine, and I found one that I think is just so much fun. It's the Zipper Panel Die from Ellen Hutson.

The die basically creates a card that's sealed on all 4 sides. To get into it, the recipient has to peel up a middle zipper panel to reveal the inside of the card, along with any goodies you may have stashed inside. You can see a cool demo in this video. (You also get a 3 bonus word dies!)

I think the die itself is designed to hide a gift card or cash inside, but I thought it would be fun to have a little surprise birthday invite inside instead. How fun for little kids to get to tear open a card!

Here's a quick rundown of how I created these invites.
First, I found the cheapest way to print the inside of the invitations was to get them as 4x6 photos locally. The inside 'window' of the die is 4.5 inches by 3.25 inches; so make sure to center the image in a rectangle of that size.
 Create two die cuts of the zipper panel, and cut just the center panel from one as shown in the video above. Then glue the partial panel to the back of the whole panel.

Now we can decorate our card front! Because I would eventually have to create 10-15 of these I wanted to keep it as simple as possible.  I used the 'celebrate' die that is included in the set and brightly colored pattern paper.
Since photo invite we printed is 6 inches tall, and our finished card will be 5.5 inches tall, we need to trim the photo. I used a extra diecut zipper panel window to center my photo invite to know where to cut. The great thing is that once you measure it once, you can use the same measurement for all your invites.  Then attach the photo to a 5.5x 4.25 peice of cardstock.
I used super strong Scrappy Tape to stick the front panel down. I love this stuff-- it's plenty strong enough to withstand pulling up on the zipper panel.
 And here it is all finished!
I have to admit, I opened this one within minutes of making it, and I was still excited to tear open the top. Almost there...
And the big reveal! I had to mark out our address :) .
 I think this is such a cute and clever card idea!It would be easy to make a few card fronts and backs in advance. Using the scrappy tape, you can have the adhesive already applied to the card front.  I can't wait to make a ton of these for all those last minute gift card giving occasions throughout the year!

Monday, February 9, 2015

WPlus9 Cupcake Wrapper Die Review

After having a couple birthday parties under my belt, I've decided that cupcakes (trendy or not) are the way to go kids birthday parties.

They are easy to transport, and avoid the mess and hassle of cutting up a cake during the party. And they are cute! Well, most of the time. At my son's Bob The Builder party last year the chocolate cupcakes made the yellow cupcake wrappers look muddy brown. This year for my daughters party I decided to try making cupcake wrappers as a way to avoid this problem.

Finding wrappers that I liked was a problem. I wanted some that weren't tall enough to touch the icing, and covered the discolored wrappers completely.


 I searched high and low for some cupcake wrapper die that met my requirements. I finally settled on these dies from W+9.


What I love about these:


  • They are slightly shorter than store bought wrappers, so I can fit 4 to a sheet of inexpensive 8.5x11 cardstock. Other dies I looked at only fit 4 to a 12x 12 sheet. 
  • They have tabs and slots for closures so they are easy to secure closed on the day off the party
  • They have a pretty edge, but aren't overly feminine or masculine. (See how boyish the ones in the picture are!) 
  • They cover the entire cupcake paper. So many wrappers that I looked at were lacy or see through-- which didn't help with my chocolate bleed through pattern. 
  • And... they come with an optional accessory pack to decorate the wrappers with! 
Here's a quick rundown of how to put them together:

Since a standard sheet of paper won't fit through your diecutting machine, you'll have to cut your paper in half hamburger style. Be sure to place your die as vertically as possible since it's a tight fit to get two wrappers in each half.

 These would be so gorgeous done on pretty scrapbook paper. Since I was making so many (and I was on a budget) I ended up using plain paper, and then stamping it with a floral design. I looked through my stash for any floral stamps, and arranged them using a wrapper as a guide. I then used one of my large quilting rulers to pick up all the stamps at once.
 This way I was able to stamp each liner just once, and finish two dozen in just minutes. Score!
 The notches do an awesome job of holding the wrappers together, so you can store them flat until the time of your party.
 The accessory pack for the the wrappers is adorable too. The is a die for a bow and tails. It doesn't look like much once it's cut out...
 But it's so adorable once it's folded. I love that I was able to make the bow with just one glue dot-- super simple if you have to do a bunch.
 You can also play around with the tails to create different styles. There is also die for the paper ribbon that goes around the wrapper as shown on the blue cupcake wrappers from above.
 They just made my little cupcake display. Not a single one fell apart-- and they were so easy for little hands to hold!
 Looking at this picture from above you can kind of see how much darker the chocolate wrappers are in comparison to the vanilla, but the cupcake wrappers made everything look nice and consistent. They were super quick and easy to make, (and fun too). Next, I want to try stamping a personal sentiment on the wrappers when I make small batches as a gift! How cute would it be to deliver a cupcake that says "Happy Birthday" or "Thank You" on the wrapper? That's my kind of gift :)

I want to send a a huge thank you to W plus 9 for sending me the dies to use for this review. I was not compensated in anyway, and all opinions are my own.


Monday, January 19, 2015

Tips For Cardmaking On A Budget... Part 1

I mentioned before the break how I had fallen into love with Lawn Fawn's cute graphics. Although I'm hardly a papercrafter, I decided to try my hand at making a few cards (which is what their products are designed for). And kind of like my embroidery obsession over the last holiday season, it became a fun little craft to do over the holidays when I had a few minutes here and there.

Since I like to make things assembly line style, I made quite a few of these little cards that I'll be showing through out the week. Although I'm definitely not an expert... I'll be sharing a few tips I picked up along the way.

Tip #1: 'The base most of these cards was a 'value pack' of blank cards from Michael's. (I think it was 5 dollars for 40 cards!) Instead of trying to find coordinating paper, I just 'cannibalized' the card set, and used the front and back of other cards to stamp on or create a matte (like the card above). It's so nice to know that all of the paper goes together; and I don't have to purchase any extra materials.
Tip #2: Use (real)scrap paper if you can! The green grass in the picture above came from a green envelope. It's not nearly as heavyweight as designer paper, but for a small space in a pinch, it does the trick!
  Tip #3: Look for the small stamps. I love the tiny stamp sets that Lawn Fawn puts out. They are normally only 2-4 images with a sentiment, but  they are more than enough to make a card all by themselves. Plus, they are super fun to mix and match with other sets. Each set is around 4 dollars, which is easier to swallow than having to pay 12-15 dollars for a larger stamp set.
I'll be back with more tips (and cards) later this week! I admit to having an ulterior motive for these posts... I'd really love to drag some of my sewing friends over to dabbling in some papercrafting with me :).

Tuesday, December 9, 2014

DIY Reusable Felt Gift Tags Tutorial

Every year in my family we do a Secret Santa draw at Thanksgiving for gifts to give over Christmas. It's one of my favorite Christmas traditions! Not only do I have to shop for one gift instead of 7, but my fairly normal family turns into something like a spy agency for the month.  There is lying, spying, subterfuge, and we've even had to enlist a third party arbiter when someone forgot who they were buying for.


Learn to make reusable gift tags from felt scraps using your papercrafting tools!
Part of our Secret Santa rules is that each recipient has to guess which person is their Secret Santa after opening the gift. Over the years that's meant that no one wants to actually write the recipient's name on a gift tag, lest the handwriting give them away. This time I decided to make re-usable gift tags to at least nip that problem in the bud.

Materials:

These tags are made using Lawn Fawn stamps and dies-- specifically the Winter Gifts stamp set, and Quinn's ABC's dies. The ABC dies are simply amazing-- I would not have done this project if I had to cut out all those little letters.  You'll also need:

  • Felt for tags (at least two colors)
  • Heat and Bond Lite
  • Ribbon
  • Any stamping ink (I used Momento Tuxedo black. 
  • Scrap fabric and/or felt (for letters and embellishments)
  • Coordinating ink (optional) 
  • Embroidery thread  
  • Cropodile
  • Sizzix Fabi with multi purpose platform

Let's Get Started:

First, take the large tag stamp from the Winter Gifts stamp set, and stamp it repeatedly on the paper side of the heat and bond. This is so much faster than tracing a template!

Learn to make reusable gift tags from felt scraps using your papercrafting tools!
A quick tip-- I didn't have a stamp block large enough for the tag stamp-- so I just used the back of a clear pyrex baking dish. Worked like a charm!
Learn to make reusable gift tags from felt scraps using your papercrafting tools!
Iron the heat and bond onto the backside of your felt. This felt will be the top felt on your finished tag. Use the outline to cut arond the outside of the tag. Another option is to use the Tag You're It die set.
Learn to make reusable gift tags from felt scraps using your papercrafting tools!
Iron the tag shape onto a coordinating scrap of felt, and cut out leaving a quarter inch border around the tag.
Learn to make reusable gift tags from felt scraps using your papercrafting tools!
Now for the fun part! You can decorate your tag using the stamps that came with the Winter Gift set.
Learn to make reusable gift tags from felt scraps using your papercrafting tools!


Learn to make reusable gift tags from felt scraps using your papercrafting tools!
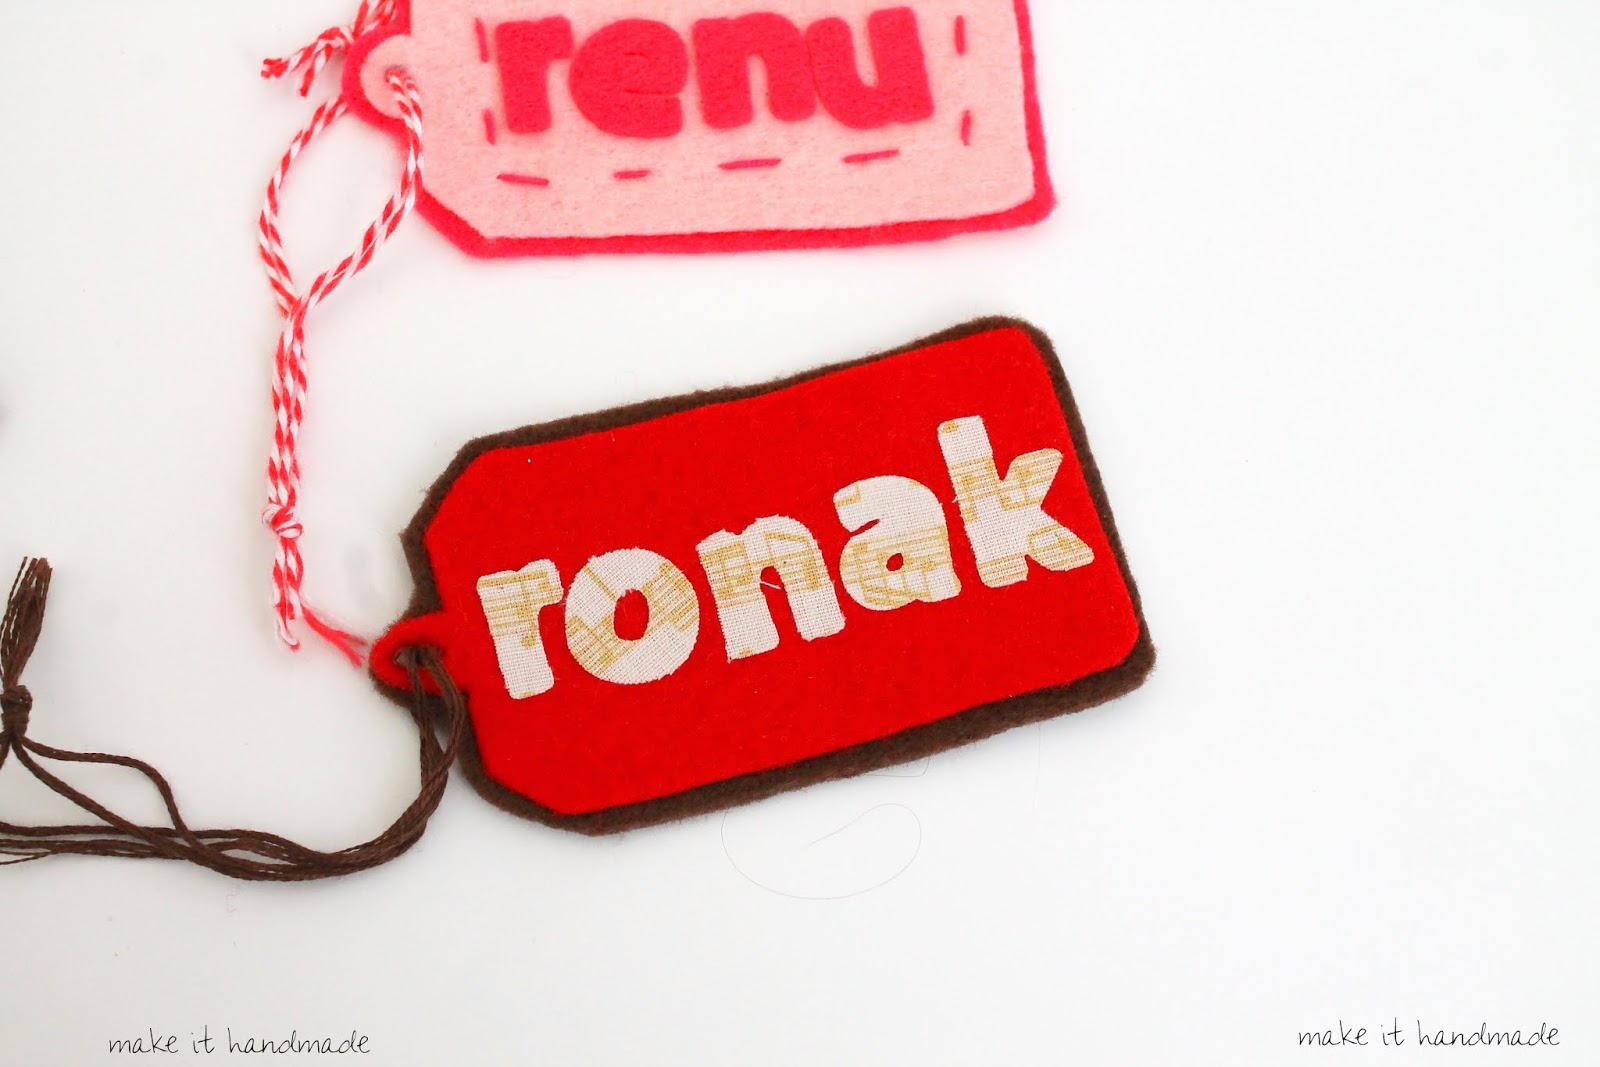
To put the names, iron on heat and bond to a scrap of fabric or felt, and use the ABC dies to cut the letters out. You can cut all the letters out at once, or do each name individually. Remember to put the heat and bond side down and the letter dies on top of the felt so they look correct to you. I messed this up no less than 3 times while making these tags.
Learn to make reusable gift tags from felt scraps using your papercrafting tools!
Then it's just a matter of ironing on the letters to the tag. Use a cropodile to punch a hole in the side of the tag, and and an eyelet if you wish. Then thread a scrap of ribbon or twine.
Learn to make reusable gift tags from felt scraps using your papercrafting tools!
 Other embellishment options include doing a bit of embroidery...
Learn to make reusable gift tags from felt scraps using your papercrafting tools!
 Or cutting the letters out of Christmas fabric.
Learn to make reusable gift tags from felt scraps using your papercrafting tools!
Right now, these are hanging on my tree waiting for the Christmas day crazies (ahem, my family!) I also plan to make a few 'from Santa' ones to use for my kids for as long as they believe. If you give gifts to the same people from year to year, I think these little tags would be wonderful to pass around your family.

If you liked this project, stop by Lawn Fawn and take a look at their other tag sets, winter themed stamps, and their adorable critters. You'll definitely be seeing more of them on MIH!


pssst... don't forget -- there's just one more day to use the ScrapbookPal discount code (Handmade) for a free sample of Scrappytape! While you are there, check out their clearance-- they have embroidery kits for $2!