

She is an incredible woman, who has taken care of others for nearly her entire life. She helped raise my grandfather's younger siblings, her own children, her grandchildren, and still makes sure to have a pantry full of sweets whenever my kids drop by.
A couple months ago, I mentioned in my Foldover Tote post that I have a "3 bag" system that works perfectly for me to keep all my stuff (and my kids stuff) together and organized. Here is the breakdown:
- a wristlet for the essentials (license, my phone, and lip gloss!) for short trips like picking my son up from school.
- a mid sized purse for the rest of the things I need for a longer trip out. Currently I'm loving the Tulika Tote for this!
- a diaper bag that has everything my kids could possibly need for a day out-- blankets, snacks, a couple changes of clothes, a few toys/board books, and of course diapers.
Now that my kids are older, the diaper bag gets left in the car most days, and I feel free to grab my wristlet, or purse, or both and go where I need to!
I've been meaning to make a similar set for my grandmother (minus the diaper bag of course!) My grandfather has recently had some medical problems, and lately my grandmother has more to keep track of than usual. If anyone needs a purse system, it's her!
Using hardware from Consumer Crafts and fabric from my most recent shopping spree, I whipped up a quick tote and wristlet.
The tote I made from scratch...


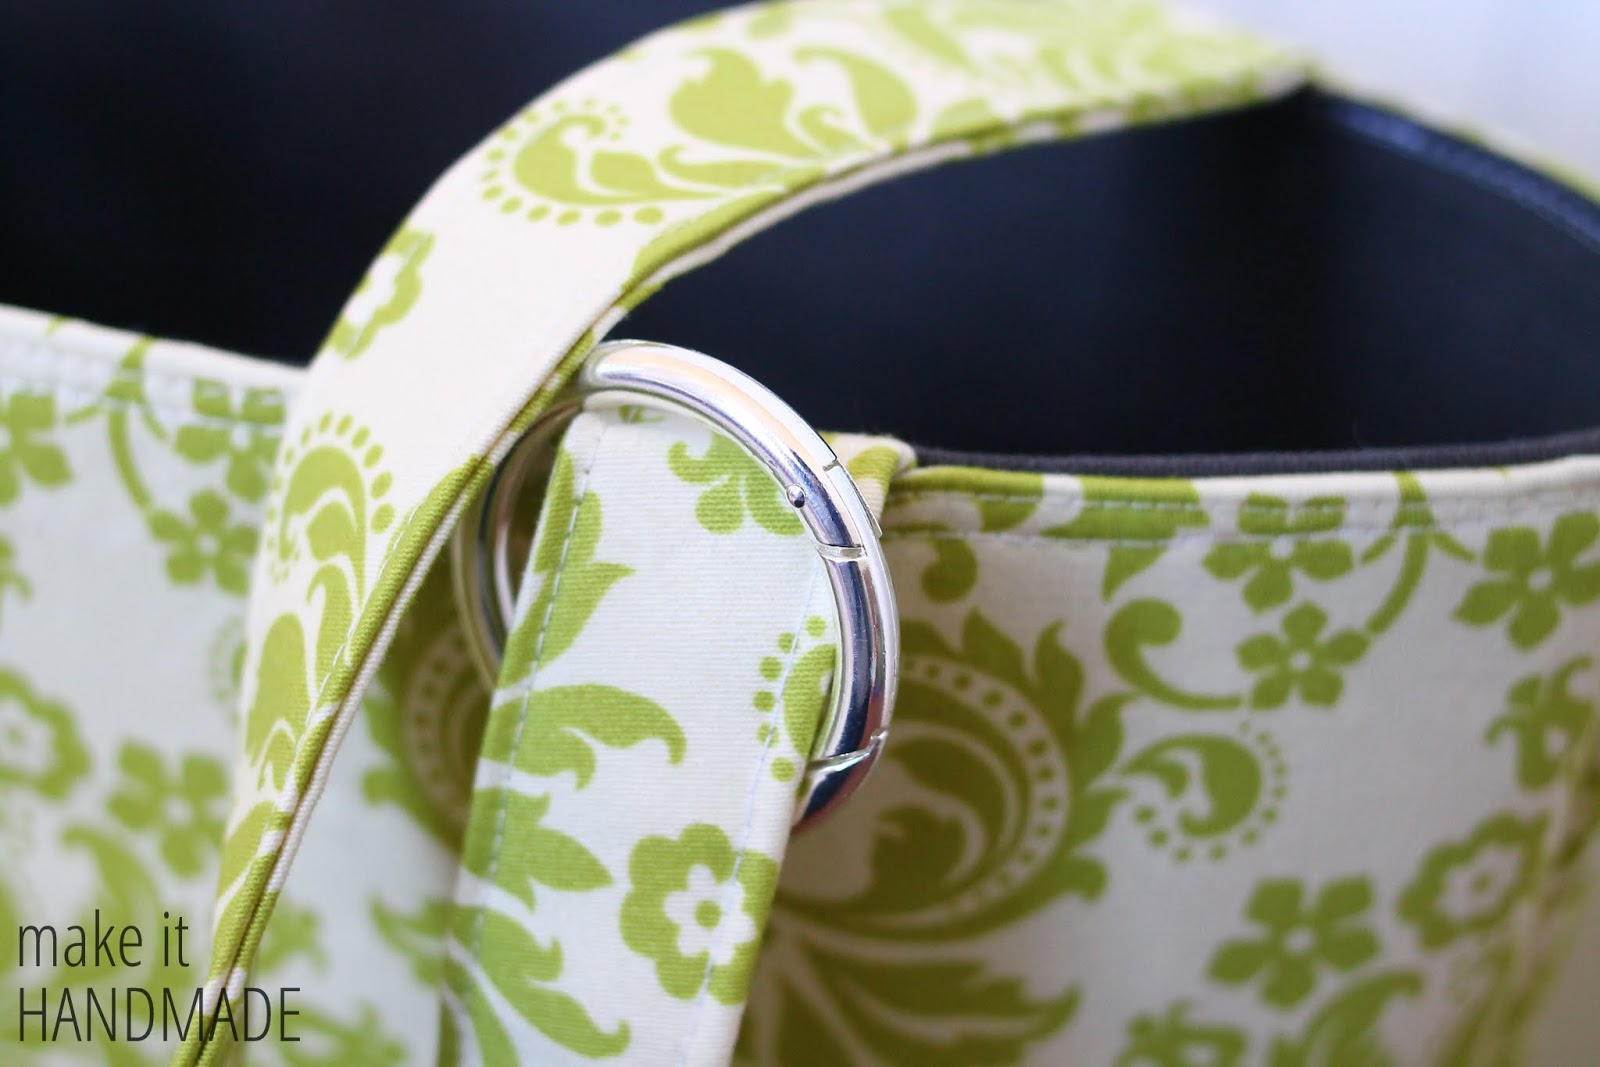
This gorgeous (and fantastically priced!) purse ring can be use to hook the wristlet or keys to the bag.

To make the strap you'll need a 2" by 15" rectangle of fabric, and a clasp.
Fold the edges of the fabric in toward the center of the strip as shown.


Now all that's left to do is to refold and topstitch around the strap. Scoot the clasp out of the way as you stitch.
You can also back stitch the clasp in place (you can see I forgot to do that in the pictures above!). I learned this method of making the strap from Vanessa, the genius behind LBG studio, and my fellow Willow & Co designer. It's so neat, that it's difficult to see the seam once you are finished.
I've already given this set to my grandma, and she loves it! A huge thank you to Blueprint Social and Consumer Crafts for sponsoring this post as part of their Random Crafts of Kindness promotion.

- Facebook: http://www.facebook.com/ConsumerCrafts
- Twitter: https://twitter.com/Consumer_Crafts
- Pinterest: http://pinterest.com/consumercrafts/
- Instagram: http://instagram.com/consumercrafts
Anyone else planning a fun surprise gift? Leave a comment and tell us all about it! We promise that we won't spill the beans :)